Showing posts with label baking. Show all posts

Monday, December 21, 2015

An Update, after forever

Hello, non-existent readers.

That's not a slight on you, if you readers are indeed existent. (Or, I don't know, maybe you enjoy existential crises. If so, you might be an English PhD student like me.)

That's right. You read that parenthetical comment correctly: since the last time I updated this blog, I have graduated from undergrad at Cornell, and am now selling my soul to the devil working away at my second year of grad school life in the English PhD program at Emory University. All those hours procrastinating while I was supposed to be studying for the GREs and which were actually spent watching TV and baking have paid off, it would seem (if three hour seminars on literary theory and posthumanism and crime fiction and feminist theory are your kind of thing).

Roasted fingerling potatoes (multi-colored!) & broccoli (curried!), but most importantly: Sarah Manning

Let's cut to the chase though: I am a terrible blogger.

Raspberry muffins: made with this blueberry muffin recipe, substituting raspberries instead
It's true. You can say it. I really am.

The last time I updated was more than two years ago. No goodbye, no apologies... nothing. I just up and went. Can we blame it on the grad school applications? Well, not really, since I didn't take the GREs until the September of that fateful year (2013) and then the Literature Subject GRE in October and then applications in December and January... and then the last year of undergrad.

Ah, those days... the sandwiches from Temple of Zeus I remember fondly; the GREs, not so much.
But then there was a whole summer of doing absolutely. nothing. zero. zilch.

I learned to cook, added more baking recipes to my arsenal, and still. Crickets.

I never touched this blog.

How naive was I back then in the summer of '69 2013, when I thought that I could properly maintain a quality food blog? So so naive.

Fruit-infused vodka (12, 3, 4), and also see: fruit-vodka lychee-juice cocktail.
Grad school has made me slightly less so. (Grad school has also driven me to drink... but seriously, my fruit-infused vodkas are so. damn. good.) So... this is  not a promise that I will update this blog frequently, or even at all. But: I am going to go through comments and reply to the few that you lovely souls have left on my posts, and we'll see where we go from there.

Popovers, perfected!
I can minimally cook now (and even on a grad school stipend!), and I've perfected some of my old recipes (see popovers above and below), so maybe, just maybe, one day I'll find the time and willpower to update once more.

When your popovers are more photogenic than you are.

Until then, here is a link to my Instagram (username: @airplangs), where I mostly post photos of food I eat and occasionally even food that I've cooked. Me! I can cook! (When I'm not being lazy/too stressed out to eat anything other than potato chips and bread.) I've even come up with my own concoctions, like the mini latticed blueberry pies (shown below), roasted potatoes and curried broccoli (pictured above, with the Orphan Black picture because oh god yes, that show gives me LIFE), and other easy/healthy one-person dishes, so hopefully (maybe this winter break! Or more likely, next summer break) I will get my butt back into gear and post some recipes for you!

Mini blueberry pies, made with crescent dough, and accompanied by Oryx and Crake

Ever yours in procrastination,
Amy

Wednesday, July 17, 2013

Easy Blueberry Muffins

I think I spoke too soon.

It is even hotter than it was before. 102°F. 102°F. Ahhhhhhhh!


And yet, I decided that today was the perfect day to whip up my second batch of blueberry muffins in the span of a week.


Still perfect. Still delicious.


Still dying in the heat.


But still worth it. Oh yes. These muffins are so good.


The recipe, which is almost identical to the one my mom and I used to use but couldn't find anymore, is from here. Yields 12 muffins.


And those 12 muffins go quickly.


INGREDIENTS
- 1 (large) egg
- ¼ cup oil
- ½ cup milk
- 1½ cups flour
- ½ cup sugar
- 2 tsp baking powder
- ½ tsp salt
- 1 cup blueberries


Preheat your oven to 400°F and either line 12 muffin-tin cups with paper liners or spray the bottom and sides with cooking spray. (I like how the ones without paper liners get nice golden sides, but the ones with paper liners are much easier to get out of the tins.)

In a small or medium mixing bowl, beat the egg until foamy. (I don't think it matters how foamy it is, but beating until foamy should make the cupcakes slightly lighter.)


Beat in the oil and milk.


In a separate, large mixing bowl, sift together all the dry ingredients (flour, sugar, baking powder, and salt).


Stir in the blueberries. I used slightly over 1 cup because I mean, come on- the more blueberries, the merrier!


(In the past, I have waited until after adding the wet ingredients to add the blueberries, but I'm guessing that putting them in before yields blueberries that burst open while baking, which is deliciously awesome.)


Make a well in the center of the dry ingredients and pour in the liquid ingredients.


Incorporate the wet into dry ingredients fully. (Original recipe suggests only mixing for 25 to 30 strokes, but I don't think this matters very much.)


Fill the cups in your muffin pan(s), filling each muffin cup slightly more than half-full. (I forgot to take a photo the first time, so these are from the second time I made them this week!)


Bake for 18 to 20 minutes, until muffins are golden-brown and the centers test done with a toothpick.


Loosen the sides of each muffin with a spatula or toothpick and turn them out to cool.


These taste best when still warm, but the ones I didn't immediately devour were inhaled for breakfast the next day.


I'm going to say it: blueberry muffins are the best muffins.


Unf. So so good.

Thursday, July 4, 2013

Savory Broccoli and Cheese Muffins

Confession: I actually made these muffins on Sunday, but... I've been too lazy to write up an accompanying blog post.


I have been finding it difficult to muster up any ounce of motivation at the moment. (I did finally sign up for my road test but uh yeah... I've been putting that off for three years.) What can I say. I am a master procrastinator.


In any case, Sunday night was the Confederations Cup final, and I really did stay at home, instead of going out with my parents to my favorite Chinese restaurant (well, the only good one in Ithaca), in order to watch Brazil beat Spain. I probably wouldn't have been too upset if Spain had won, since they're my second favourite national team, but the Green and Yellow are my number one.


I promise it was a coincidence that these muffins are also green and yellow, but we'll roll with it. (Accidentally on purpose!)


I heavily adapted this broccoli and cheddar muffins recipe, using larger florets to make a little broccoli tree in the center! I didn't trim my florets enough so some of them peeked out over the top of the muffins, but I mean, it's the taste that's the most important, and these are definitely some tasty muffins.


Anyway, since it's still very hot and humid right now, I think I'll just let the recipe and photos take it from here. (And let me tell you: I loved photographing these muffins. So photogenic!)


INGREDIENTS
- ½ cup broccoli florets, cut into bite-sized pieces
- 6 small broccoli florets
- ¼ cup vegetable oil
- 1 large egg
- ½ cup water
- 1 cup AP flour
- 1 tsp baking powder
- ¼ tsp salt
- ½ or 1 tsp paprika
- ¼ tsp cayenne pepper
- ⅓ cup shredded cheese
NOTES: 
• This recipe yields 6 muffins.
• I used a ½ cup of bite-sized broccoli, but I think that if you wanted more, ¾ cup would still work.
• You could use buttermilk or milk instead of water, but I didn't have any on hand.
• Original recipe would call for ½ tsp mustard powder instead of paprika, but again, I didn't have any of that in the kitchen, and I think I would prefer paprika anyways.
• I used ½ tsp cayenne pepper because I wanted my muffins to be extra-spicy, but they're still spicy even with ¼ tsp.
• I used a mixture of Colby Jack cheese (I only had a little left in the bag, so might as well use it up!) and a Four Cheese blend.
• This recipe can easily be doubled if you're looking to serve more people and/or have more leftovers for breakfast, brunch, etc.
• I promise this recipe is not as difficult or lengthy as these notes and ingredient list are! :D


Preheat your oven to 350°F and either line a 6-cup muffin tin with paper liners sprayed with cooking spray OR simply spray each cup of the muffin tin, sans liners. (I tried both ways, and they work equally well.) Set aside.

Cut a handful of broccoli florets into bite-sized pieces, but leave 6 florets whole. (I ended up using just over half of a head of broccoli.) Then trim the 6 remaining florets down to size. (Mine were a little too large, so the batter didn't completely cover them in the muffin tin, but I'm okay with that.)


In a large bowl, mix together the oil, egg, and water.


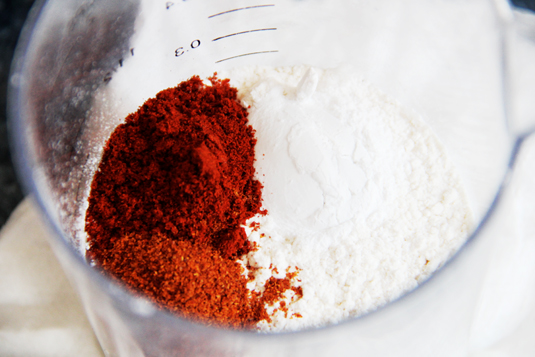
In a large measuring cup or medium bowl, add together the flour, baking powder, salt, paprika, and ground cayenne pepper.


Add the dry ingredients into the wet, and mix until just combined.


Gently fold in the shredded cheese and bite-sized broccoli.


Pour out some the batter into the muffin cups until they are 3/4 full. Then place one of the broccoli florets in the center of each muffin cup. Top with remaining batter, filling the muffin cups. Try to spread the batter to cover the broccoli florets. Alternately, you could place the florets into the cups first, before pouring the batter around them. This way might make it easier to cover up the florets entirely. OPTIONAL: You could top with more shredded cheese.


Bake for approximately 30 minutes, or until a toothpick comes out clean.


Voila! Tasty cheesy broccoli muffins.


These look so cute when cut in half, revealing the tiny broccoli tree!


I think these tasted best when still nice and toasty, about 30 minutes after coming out of the oven. However, they still taste good the next day. (and probably after that too, but they didn't last that long with me in the house!) You could even stick them briefly into the microwave or toaster oven to reheat them.


Yum. The broccoli is nice and soft, just like it would be in a cheddar broccoli soup, and the cayenne gives a nice kick to the tastebuds. (Ooh yes, I do love spicy food.)


(I immediately ate three. And I'm not remotely remorseful about that.)


Enjoy!

Tuesday, June 25, 2013

Orange Olive Oil Madeleines

Today, something horribly wonderful happened.

Joss Whedon (yes, the actual Joss Whedon, Avengers-Buffy-Firefly-Toy Story wait- I didn't know he wrote the screenplay for Toy Story! That makes me love him even more than I thought I possibly could!) tweeted my string ensemble's arrangement and video of Dr. Horrible's Sing-Along Blog:


ahsdjfklaskjdhfjkadlskjdhfjdalskjdhfjkla WHAT IS AIR.

HOLY HAMMER FREEZE-RAY.

I suddenly had over 50 Youtube notifications in my inbox from within a single hour. We went from just over 4,000 views (and that was after a few "tumblr-famous" people had already reblogged our video) to over 15,000 views in less than a day. CRAZY.

And still, though the numbers seem impressive, my mind is still boggling over the fact that the venerable Joss Whedon, master of all things horrible and/or shiny in the 'verse, has seen our video, let alone that he liked it. Scratch that, loved it! A video with me in it! My quartet! Joss Whedon! Me!


Donna Noble: spirit animal

Yeah... so what does this have to do with food? Absolutely nothing.

But I did make more madeleines yesterday!

taken with my iPhone
I adapted the recipe I used previously for these lemon madeleines and came up with these orange olive oil madeleines! I actually think these are moister and fluffier than the previous ones, and now I don't have to smell that awful raw butter stench anymore! (I seriously don't know what's wrong with me, but I can't stand that smell.) Plus, I'm willing to bet that these are healthier!


Since most of the steps are identical to those of the lemon madeleine post, I won't spam you with the requisite amount of photos I usually include, and will just give you the instructions instead!

(Still freaking out about Joss Whedon.)

INGREDIENTS

- 2 eggs
- ¾ tsp vanilla extract
- ⅛ tsp salt
- ¼ cup white sugar
- ½ cup AP flour
- 1 Tbsp orange zest
- ¼ cup olive oil
- (optional) powdered sugar for decoration


NOTE: The batter using olive oil instead of melted butter is a little more liquid-y, so it makes 28 mini madeleines (which probably translates to 14 regular-sized madeleines).

• Preheat oven to 375°F. (You may choose to turn on the oven a couple of steps later, after having beat the eggs/sugar mixture and grated/zested the orange peel, but it won't hurt to preheat early so that you don't forget.)

• In a medium to large-sized mixing bowl, beat the eggs, salt, and vanilla extract at high speed until light and slightly frothy, using an electric mixer or hand mixer.

• Beating constantly, gradually add the sugar, and continue to beat the mixture on high speed until it is thick and pale, and ribbons form when you lift the beaters. (Beating for 3 to 5 minutes was sufficient time in my case.)

• Sift the flour into the rest of the mixture a third at a time, gently folding in the flour after each addition.

• Add the orange zest.

• Now, measure out ¼ cup of olive oil. This is the point at which I prepared the madeleine molds, rather than right after preheating the oven. You can use some of the ¼ cup olive oil to grease the molds, using the very tips of a basting brush. Then lightly flour each mold.

• Now, use the rest of the ¼ cup olive oil, pouring it around the edges of the batter. Quickly but gently fold the olive oil into the batter.

• Spoon your batter into the molds; the batter should slightly mound above the tops. Again, the olive oil version is more liquidy, so the mounds won't be as prominent as they would be with a butter recipe.

• Bake for 14 to 17 minutes, or until the madeleines are golden and the tops spring back when gently prodded by your fingertip. (Mine baked in 15 minutes.)


• Let the madeleines cool in the molds, for at least 15 minutes. Pop them out of the molds carefully, and let cool on a plate.

I made these late at night, so the lighting is very different from usual!

I personally think these taste best when still warm - go ahead and test "a few" after they cool off a bit :P - but they can keep for a few days, and are even good beyond that when dunked in coffee or tea! Because the olive oil ones are moister, you may want to lay them shell-side down on a dry paper towel in a container.


(Another note: the grooves/shell patterning are more noticeable when using nonstick molds, rather than silicon. Nonstick pans also give a more golden coloring to the madeleines. However, nonstick cooking ware have chemicals, or so my mom tells me, and in any case, silicon is so easy to clean up at the very end!)


I brought these to work and also gave a few to friends (shoutout to Maddie and Marza!), and they all loved them! (And then Maddie told me that one of her summer course professors was raving about our video in class.)


Brilliant end to the day! (Or should I say... horrible?) <3