Friday, May 31, 2013

Balsamic Caramelized Peppers

Okay so I didn't technically cook this one. But that was because I was too busy taking photos! I do know how to make this for the future though.

...which isn't saying much, since it's such a simple dish.


But the good thing with making such easy dishes is learning tiny little cooking tips from my mom that I wouldn't otherwise think to do. They seem so obvious when she says them, but I'd probably never know to do these tricks otherwise. Things like sprinkling a tiny pinch of flour in the pan before frying up an egg so that the oil doesn't spit up and splatter everywhere, and wrapping the neck of a vegetable oil bottle with a napkin and rubber band to soak up the stray rivulets of oil.


Or how to properly caramelize veggies - in this case, sweet peppers. Sugar makes for caramelization - duh, but it's like adding salt to a dessert batter. I just don't think about it unless I really think about it.


These balsamic caramelized sweet peppers are really juicy and tasty! Simple flavors are often the best flavors, especially in hot weather like this, when all I really want is to eat something light and then prostrate myself in front of the fan.


INGREDIENTS

- Small sweet peppers and/or bell pepper(s)
- Balsamic vinegar
- Olive oil
- Soy sauce
- Sugar
- Salt


Wash peppers and remove stems. If using bell peppers, cut into smaller wedges. (Aren't the colors so beautiful?)


Coat a nonstick pan with olive oil (extra virgin, in this case), just a thin layer. Add some salt, and then a little sugar (I didn't measure how much to use, but I'd say maybe 1/2 to 1 tsp - just a little bit, to help with caramelization.


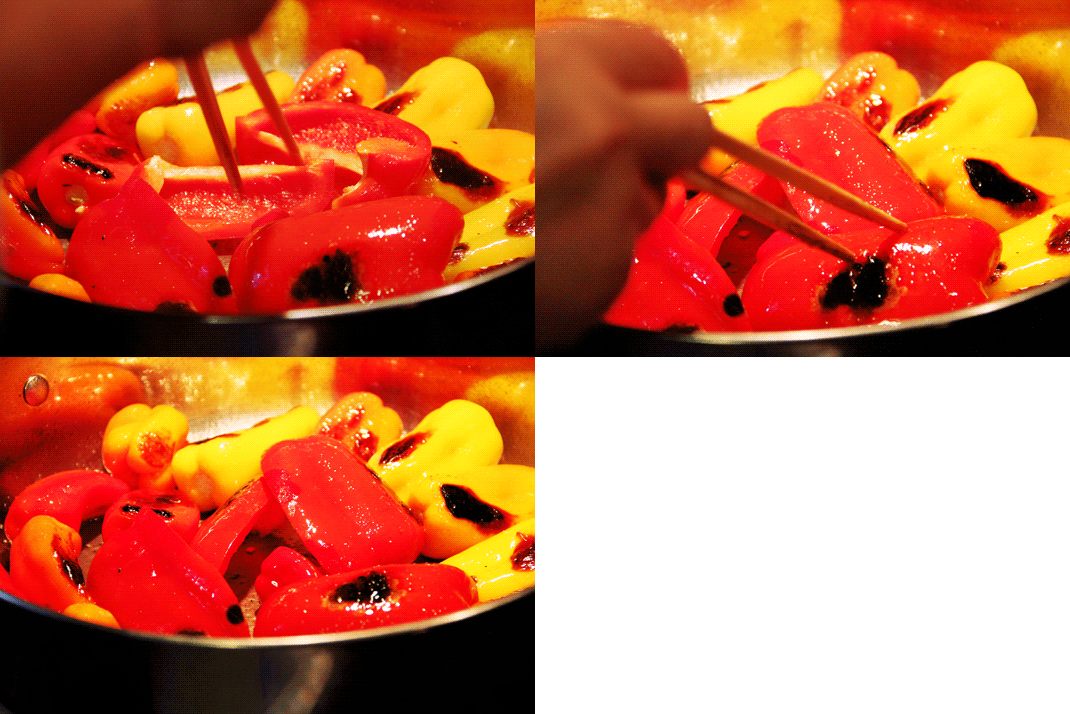
Put in your peppers, and drizzle some more olive oil over them


Cover the lid, and let the peppers cook on high heat for about 5 minutes. When you think these sides of the peppers have cooked long enough, open the lid to check on your peppers' caramelization. (Lots of steam will come out, so be careful!)


Flip over each pepper onto its other side.


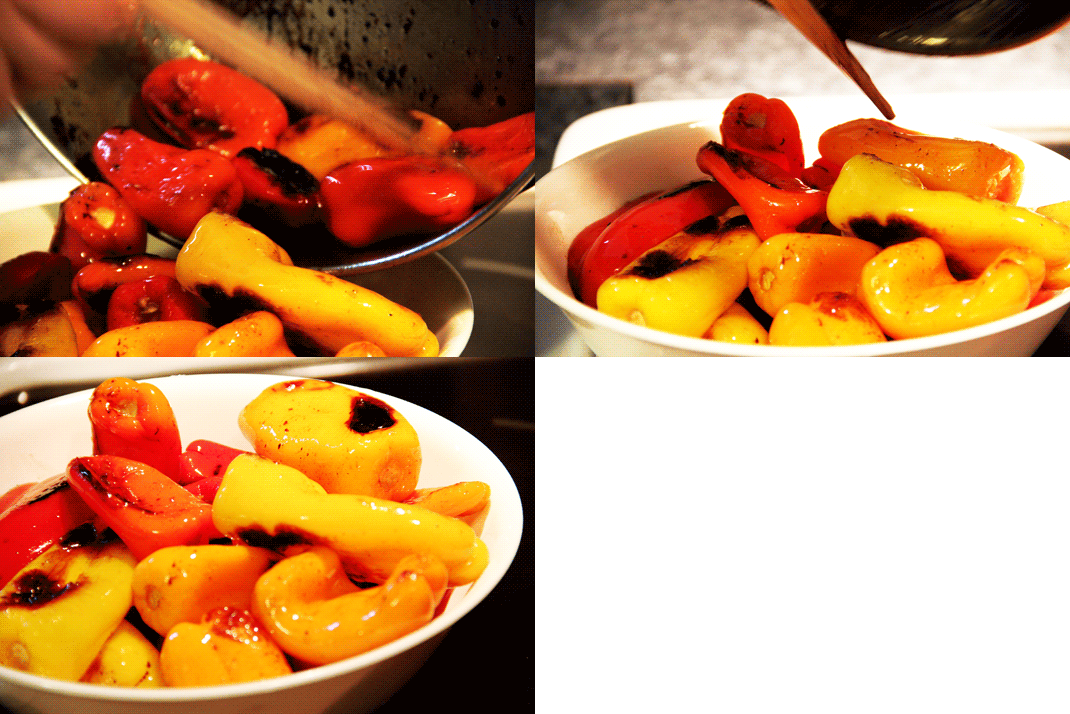
Drizzle in some soy sauce and balsamic vinegar (not too much of either), cover the pan back up, and let the peppers cook for about 2 minutes longer.


Serve them up, and enjoy!


Stupidly simple, but definitely delicious!

Wednesday, May 29, 2013

Sausage & Apple Quesadilla

My family isn't a huge fan of sweets. Don't get me wrong: an occasional sugar bomb isn't out of the question for me. (And cupcakes. Uf. Can't resist!) But we generally prefer savory foods, and when I'm baking, I tend to alter the recipe by taking out some of the suggested sugar amount.

So my mom tends to stick with the savory food when she's cooking, and I predict that I'll do much of the same... unless the sweet is mixed with savory. I'm talking about there being a bowl of grapes set aside on one side of the counter, and a bowl of short ribs on the other. I will gladly alternate between the two.

One combination that has always piqued my interest is sausage and apple. I'm not even sure that I've had those two together before today, but in any case, I decided to cook up a sausage and apple quesadilla for brunch just to see if it was as good as I had hoped it would be.


¡Que sabrosa! So tasty.

Admittedly, it is rather unwieldy for a quesadilla... requiring knife and fork (or in my case, a knife, chopsticks, and hands). But hey, I was hungry!


So here you have it, a big tasty quesadilla that's easy enough for noobs like me.

INGREDIENTS
1/4 to 1/2 apple *
spicy Italian sausage **
shredded cheese ***
1 flour (or corn) tortilla

* I used a Gala apple
** I used about a 1:1 ratio of sausage to apple, but it shouldn't matter as long as it tastes good to you!
*** I used Colby Jack

The sausage isn't pictured above in the ingredients photo because alas! it was already cooking on the stove before I remembered that I needed my camera!


Take the sausage out of its casing, breaking it down into smaller pieces, and brown it in a nonstick pan on low to medium heat. The oil from the sausage should be enough, especially with the spicy sausage I was using. (Though I'm sure a little olive oil won't hurt if you want to use some!)

Meanwhile, with the sausage happily cooking away, peel and cut your apple. I'm really not so good at peeling apples yet. (Still afraid of the knife!)


When all the sausage pieces look slightly browned, add in your apples. I wanted mine to be somewhere in between crunchy and soft, so I let them cook with the sausage for a couple of minutes, stirring to make sure none of the sausage was still pink.


When the sausage and apple mixture is cooked sufficiently to your taste, empty it out into a bowl and set aside.


Lay your tortilla in the pan and sprinkle some cheese on it. (There was enough leftover oil from the sausages that I didn't need to add any extra olive oil, but use your judgement!)


When the cheese starts to look a little melted, add in your sausage and apples.


Add some more cheese on top, which will help the quesadilla stick together when you fold the tortilla in half. (I probably should have added more cheese.)


Fold the tortilla in half. I had a little too much filling, so it got a little messy with this step. (Apples overboard!) Alternately, you could distribute the sausage and egg evenly across the whole tortilla, and then lay another tortilla on top. I only wanted one tortilla though, so I got a very corpulent quesadilla.


Slice it up into manageably-sized pieces, and it's time to chow down! (Did I really just type 'chow down?' I don't even know myself right now.)


How do you like dem apples? (Sorry. Sorry, I couldn't resist!)

(Afterwards, I cooked up the rest of the three sausages and half an apple and stored them in the fridge for even quicker quesadillas next time!)


Do you happen to like any food combinations that initially sound strange? (My mom thought the sausage and apple might not turn out tasty, but aha! I liked it!)

Anyways, hope you enjoy your quesadilla if you decide to try this out!

Saturday, May 25, 2013

Egg & Tomato Pasta

Baby steps, Amy. You're not going to become an accomplished cook in one day.

As much as I would loved to have made some fancy-schmancy dish for you all, I decided to start with the basics. This dish is one that my family makes quite often on a lazy weekend - Egg & Tomato Pasta.


蕃茄炒蛋 (literally translated: tomatoes cooked with eggs) is a typical Chinese dish in our household, and quite easy to make. Somehow, I even managed to mess it up a bit - mine weren't nearly as beautiful as my mom or dad's. Still, they taste great, and that's really all that matters, right?

Combine it with pasta and you've got a tasty brunch or lunch! (If this recipe makes me sound like a total novice, it's because I am one.) A nice simple dish for a weekend in which my dad is out of town.

Plus, the dish is in the colours of today's Champions League finalists- yellow for Borussia Dortmund, and red for Bayern Munich! I'm predicting that Bayern will win, but I'm rooting for Dortmund- hope that Lewandowski and Reus (Klopp too) can do their magic!

INGREDIENTS
4 large eggs
1 to 2 large tomatoes *
pasta of choice **
salt and pepper
soy sauce (optional)
white vinegar (optional)

* I recommend 2, because it'll give you more sauce
** I used fettuccine

Boil some water. Once boiling, add in some salt and then add in your pasta; cook to desired texture. (I don't follow this whole al dente thing only because it's too much trouble and pasta is pasta. Pasta will always be tasty, in my opinion.) You can let the pasta cook while you're getting the rest of the components ready, and once cooked enough, turn off the heat and set aside.


Crack open and beat four eggs.


Add a pinch of salt. (Optional: Add a drop of white vinegar to your eggs. This will make them fluffier, and since you will be cooking them with tomatoes, you won't be able to discern the sour taste the vinegar would usually give the eggs.)


Chop up your tomatoes, then put them aside in another bowl. Add some salt, which will help you get more juices out of the tomatoes.


Add some olive oil to a nonstick pan on high heat. When the pan has heated up (I test by using small drops of egg to see if they bubble), add in your eggs. Allow the eggs to bubble up before folding them. Don't scramble too much, as you will cook them more later with the tomatoes.


Take out your eggs, into the bowl you used before to beat them.


Add the tomatoes into the pan, and cover.


The juices should start to come out of the tomatoes. (I evidently did not add enough salt, and my tomato wasn't particularly juicy. As I said in the ingredients, it might go better for you if you use two tomatoes.) If you aren't getting a lot of juice, you can add a little water. After a few minutes, turn the stove down to low heat and add in your eggs.


Once the eggs are combined with the tomatoes and look sufficiently scrambled, you can add your pasta to the pan with the eggs & tomatoes, using a strainer (or strain beforehand and then add in.) You can add in a little pasta water if you want more sauce still. (I don't have a picture of this step, but I do have a picture of my Borussia Dortmund-coloured outfit...)


Anyways, back to the food. I decided to add some more flavor with a little soy sauce and black pepper.


Eat! (The amount of pasta I used made three servings- enough for my mom and I as well as leftovers for my lunch tomorrow!)


Oops, the tomatoes seem to have disappeared. I guess this means... Dortmund will win? Heh. Here's to wishful thinking! [eta] Well, sad to say that my predictions were correct. Happy for Müller and Neuer though!

I think next time I will add some zucchini too. (I topped it off this time with some leftover sauteed jalapenos that my mom made for dinner the night before.)

Enjoy!

Thursday, May 23, 2013

Banana Chocolate Chip Mug Cake

As promised, I come bearing another mug cake recipe!


This one was not quite as successful as the first, but still tasty enough to post, in my humble (grumbly tumbly) opinion.


Alright, so it wasn't enough to sustain me through the day, because having eaten it at 10:30am, my stomach was grumbling by 3:00 in the afternoon. Not a snack that can be used to substitute for two meals.

So I had a little snack when I got home.


(The flourless double chocolate cookies came out looking very deflated, and they ended up being too sweet, so I will try to modify the recipe and see if I can perfect it for a future post.)


Anyway, I digress... back to breakfast! When I woke up and ambled into the kitchen groggily, I noticed this rabbit snoozing in the grass outside.


Living the life! Can you smell the mug cake coming into fruition?


Yes, yes, I digress again. On with the recipe, as I'm watching a replay of the Real Madrid/Borussia Dortmund semifinal match at the moment. Hopefully I can finish typing this up before halftime is over!

This recipe is adapted from Kirbie's Cravings.

INGREDIENTS
4 Tbsp AP flour
2 Tbsp sugar
1/2 tsp baking powder
1/8 tsp cinnamon
2 Tbsp mashed banana *
3 1/2 Tbsp (fat free) milk
1 Tbsp chocolate chips **

* approx. 1/2 of a banana
** original recipe calls for mini cinnamon chips

Mix together dry ingredients (flour, sugar, baking powder, cinnamon). If you want more of a cinnamon taste, either add 1/8 tsp more cinnamon (making it a total of 1/4 tsp cinnamon) or add fewer (or none at all) chocolate chips later on.


Mash 1/2 a banana; the riper the banana, the better. The banana I used wasn't very ripe, so it was slightly harder to smush.


Add the banana to your dry ingredients, and mix. It'll be clumpy, and you don't have to mix it perfectly because it will be easier to mix once you add the milk in.


Add milk in and stir. Make sure the dry ingredients don't clump at the bottom and sides of the mug.


Now you can add in some chocolate chips, and stir. Leave a few to sprinkle on the top. (I forgot to take a picture for this step.)

Microwave for between 1:15 to 2:00 minutes. Mine came out a bit soggy still when I microwaved it for only 1:15, but you'll want to adjust accordingly for your own microwave.


(I had already dumped out the cake onto a plate when I realized it hadn't cooked fully, so it looks a bit messy because I had to transfer it back into the mug to re-microwave.)


Let the mug cake cool for 20-30 minutes inside the mug. In the meantime, you can slice the other half of the banana to decorate. (Or you can just eat it.)


Use a knife to loosen the sides, and transfer the cake to a plate if you'd like.


Eat! (Always. Eating is good.)


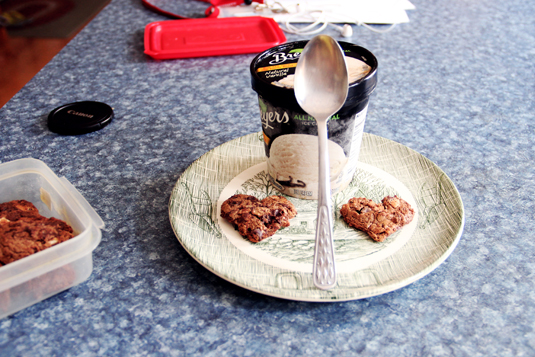
Oh, and one more picture of my cookies, now with a serving of ice cream and "I Need My Girl" by The National, before I leave.


Goodbye, Mr./Ms. Bunny!