Showing posts with label microwave. Show all posts

Wednesday, June 12, 2013

Microwaveable Mac & Cheese

I've been debating whether or not to post this recipe. It's not like any of my other 'recipes' are fancy or anything, but I feel like I've kind of let myself down.

Yes. Microwave mac and cheese.


Actually not bad! I still prefer ramen as an easy fix, but I had a little extra cheese to use up, so cheesy pasta it was. (I am the epitome of a college student, it would seem.)

I did make a mess of the microwave while trying to make this in a mug, so don't do that. Unless you actually like sopping up starchy water with a pile of soggy napkins. (I make that sound so appealing, don't I?) The original person who concocted this college-student-friendly dish did warn me in her post. But what did I do? I went, psh! I can handle it! Mug it is!


No. Really, no. One does not battle the microwave gods, armed only with a tiny coffee mug, and win. You see that water in the mug? Ended up all over the microwave plate.

A bowl is good. It's not like I have any dignity to protect at this point, so messing up the mug part the "Instant Mug o' Mac & Cheese in the Microwave" recipe doesn't even put a dent in my armor.

INGREDIENTS
- 1/3 cup pasta *
- 1/2 cup water
- 1/4 cup milk
- 1/2 cup shredded cheddar or Colby Jack cheese

* I used slightly more because farfalle doesn't fit neatly into measuring cups, and it was the only type of pasta I had.
Combine the pasta and water in a medium- to large-sized microwaveable bowl. (The larger the bowl or mug, if you insist, the less likely the water will be to overflow.) Microwave on high for two minutes, then stir. (When taking your bowl/pasta receptacle out of the oven, use paper towels or oven mitts to hold the sides, as the bowl will be extremely hot!)


Repeat this for at least 2 to 4 more minutes. I had to transfer mine from the cup to bowl, and I added a little too much water on the transfer, so I had to microwave the pasta and water mixture for a total of 8 minutes, I believe.


How to know when to stop microwaving: the water will be absorbed by the pasta, and the pasta will be cooked through. (Mine was on the al dente side, but good enough for me.) If the pasta is still too dry, add a tablespoon of water and cook another couple of minutes, depending on your microwave.


Remove from microwave and stir in the milk and cheese. Microwave for another minute or two. (Non-fat milk is more watery, so I had to microwave the pasta for another 4 minutes.)


Stir the cheese into the pasta, and eat! (Don't let it cool for too long, or you will be left with a cheesy mess that has seized up at the bottom and sides of the bowl! Also, why would you wait to eat it?)


I should be more ashamed, but I'm not. I ended up also making another sausage and apple quesadilla because they are so good. Cheesy overload for one, coming right up!


Still not ashamed.

Thursday, May 23, 2013

Banana Chocolate Chip Mug Cake

As promised, I come bearing another mug cake recipe!


This one was not quite as successful as the first, but still tasty enough to post, in my humble (grumbly tumbly) opinion.


Alright, so it wasn't enough to sustain me through the day, because having eaten it at 10:30am, my stomach was grumbling by 3:00 in the afternoon. Not a snack that can be used to substitute for two meals.

So I had a little snack when I got home.


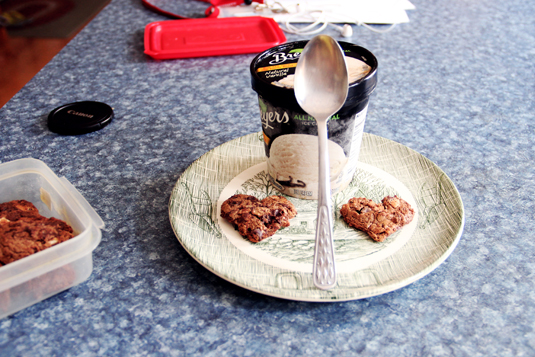
(The flourless double chocolate cookies came out looking very deflated, and they ended up being too sweet, so I will try to modify the recipe and see if I can perfect it for a future post.)


Anyway, I digress... back to breakfast! When I woke up and ambled into the kitchen groggily, I noticed this rabbit snoozing in the grass outside.


Living the life! Can you smell the mug cake coming into fruition?


Yes, yes, I digress again. On with the recipe, as I'm watching a replay of the Real Madrid/Borussia Dortmund semifinal match at the moment. Hopefully I can finish typing this up before halftime is over!

This recipe is adapted from Kirbie's Cravings.

INGREDIENTS
4 Tbsp AP flour
2 Tbsp sugar
1/2 tsp baking powder
1/8 tsp cinnamon
2 Tbsp mashed banana *
3 1/2 Tbsp (fat free) milk
1 Tbsp chocolate chips **

* approx. 1/2 of a banana
** original recipe calls for mini cinnamon chips

Mix together dry ingredients (flour, sugar, baking powder, cinnamon). If you want more of a cinnamon taste, either add 1/8 tsp more cinnamon (making it a total of 1/4 tsp cinnamon) or add fewer (or none at all) chocolate chips later on.


Mash 1/2 a banana; the riper the banana, the better. The banana I used wasn't very ripe, so it was slightly harder to smush.


Add the banana to your dry ingredients, and mix. It'll be clumpy, and you don't have to mix it perfectly because it will be easier to mix once you add the milk in.


Add milk in and stir. Make sure the dry ingredients don't clump at the bottom and sides of the mug.


Now you can add in some chocolate chips, and stir. Leave a few to sprinkle on the top. (I forgot to take a picture for this step.)

Microwave for between 1:15 to 2:00 minutes. Mine came out a bit soggy still when I microwaved it for only 1:15, but you'll want to adjust accordingly for your own microwave.


(I had already dumped out the cake onto a plate when I realized it hadn't cooked fully, so it looks a bit messy because I had to transfer it back into the mug to re-microwave.)


Let the mug cake cool for 20-30 minutes inside the mug. In the meantime, you can slice the other half of the banana to decorate. (Or you can just eat it.)


Use a knife to loosen the sides, and transfer the cake to a plate if you'd like.


Eat! (Always. Eating is good.)


Oh, and one more picture of my cookies, now with a serving of ice cream and "I Need My Girl" by The National, before I leave.


Goodbye, Mr./Ms. Bunny!


Sunday, May 19, 2013

(Vegan) (Dark) Chocolate Mug Cake

[edit] I received some comments that some of the products I used for this are in fact not vegan. The base recipe allows for a vegan version, but as I am not vegan, I am not as strict about which products I use. It was definitely an education on what goes into some products, so this is a disclaimer that while this recipe can be made to fit a vegan diet, it might not necessarily end up being vegan depending on which products/brands you use. [/edit]

In the past couple of weeks (read: finals weeks), I have been on a mission. A very important mission.

Make all the mug cakes.


All of them.

I believe that at this point, I have tested out 5 different recipes. They have all been successful except for the failed incident of the banana mug bread - looked good, tasted like rubber - of which I shall never mention again. (Poor wasted banana. You had a good inanimate life... while it lasted.)

The only thing that might possibly bar you from the most joyfully easy cake experience of your life is the amount of calories. Not that I really understand how to calculate calories from a bunch of ingredients. Not that I would ever want to. I refer you to the [self-proclaimed troll-] queen herself:


(I love her so so much sometimes.)

But on all the food blogs that I have frequented in order to find the mug cake recipes, some (I'm sure well-meaning, but as you know, the road to Hell is paved with good intentions... and a certain narrator named Dante who is prone to fainting spells) commenter has pointed out just how many hundreds of calories you're going to intake and how it will make you cry big fat tears of fat. (Or that's just how it comes across to me. I hate the 'thinspiration' movement, not only for its pretentious name.) I like healthy, just not judgmental tyranny.

Now, I don't know how many calories this one has (please don't burst my bubble), but it has a lot less oil than the other ones I have tried thus far, without sacrificing taste! In fact, I think this vegan chocolate mug cake had the best consistency out of all them, although that might have been because I am now a practiced mug cake-maker.

I got the original recipe here from a blog called Aromatic Cooking. The first time I made it, I microwaved it for a bit too long, because the previous mug cakes were a bit too moist originally. But the specs provided on the original recipe for this one are spot on!


I'm not vegan, so I did add a tiny scoop of vanilla ice cream the first time I had this, but the good thing is that if you are vegan, this is at its basis a vegan recipe! Also, cooking with eggs can be messy and/or just annoying, especially since salmonella really scares some people, so this recipe is quite simple and stress-free.

In addition, this recipe takes about 5 minutes to make, or perhaps even less time if you don't get distracted by an episode of Elementary like I did.

I will repost the ingredients and instructions here with my slight modifications, but definitely do check out the original recipe page!

INGREDIENTS *

3 Tbsp AP flour
2 Tbsp sugar **
1 1/2 Tbsp dark chocolate cocoa powder ***
1/4 tsp baking soda
2 Tbsp + 2 tsp orange juice
2 1/2 tsp oil

*be sure to check your products' ingredients if you wish to make this vegan! The cocoa mix and baking powder I used are not vegan, so substitute accordingly.
**original recipe calls for an extra tsp but I found it was fine without
***original calls for unsweetened cocoa powder. If you used sweetened cocoa powder, use less than 2 Tbsp sugar


Add all the dry ingredients (flour, sugar, cocoa powder, and baking soda) into a mug and mix. (Say hello to my awesome heat-changing TARDIS mug!)


Add in the orange juice and oil, and mix well. Make sure no clumps remain at the bottom or on the sides of the mug. (TIP: If you're lazy like me, you can use the other end of the spoon to stir, leaving the other side clean for eventual eating of the mug cake. You're welcome.)


Microwave for 1 minute 45 seconds. (You can go up to 2 minutes, but check at 1:45 to see if it's the consistency you want before adding on time, otherwise it could get quite dry.) Let cool.


(See? The TARDIS materialized into space on the other side of the mug! It travels in space and time! In a small white box that does magic wibbly-wobbly heat wave things when you set a time!)


If you want to transplant the cake from the mug to a plate, let it cool for at least a few minutes, otherwise it might crumble apart.


Feel free to decorate! Fruit, yogurt, powdered sugar, etc. I used clementines this time to complement the orange juice, but I used bananas (see above) last time and it was very delicious.


Noms.


Later that night, I got to see my favorite band of all time, The National. I got second row tickets! The music was absolutely phenomenal: they really are such great musicians, and Matt Berninger is a god.


I also got one of the band's setlists! It now resides next to one of my Audrey Hepburn posters in my bedroom.


I can now die happy.

Hope you have fun making your mug cake, and as always, comments are much appreciated! Let me know what you think of it. I will probably be testing out more mug cake recipes in future posts too.

Allons-y!